When a big EV battery meets small cables, charging slows, breakers trip, and wires heat up. That stress shortens equipment life and can spark fires. You can fix the weak links before plugging in your next ride. This blog explains home EV wiring from start to finish. You will learn to check your service panel, choose an EV charger, run new circuits, and protect every connection. Follow each step, and your garage will welcome an electric vehicle with speed, safety, and room to grow.
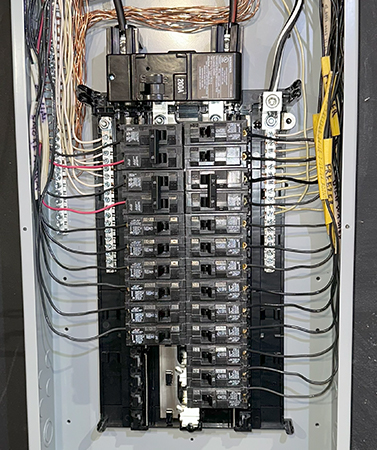
Check Your Panel’s Headroom First
Start with the main breaker rating, usually stamped inside the door. Older homes often carry 100 amps, while newer builds sit at 150 or 200 amps. Next, list large appliances and their amperage: range, dryer, heat pump, water heater, and air conditioner. Add the numbers. Then multiply by 1.25, because the code treats continuous loads like charging at 125 % of actual draw.
Compare that total to the panel size. If the result exceeds 80 % capacity, you need more amps before adding a new line. An electrician can perform a formal load calculation, yet this quick math offers an early signal. Enough headroom means smoother charging and fewer trips to the breaker box.
Pick the Right EV Charger Level
Level 1 uses a regular 120-volt outlet and adds about four miles of range each hour. That pace works for very short trips but feels slow for most drivers.
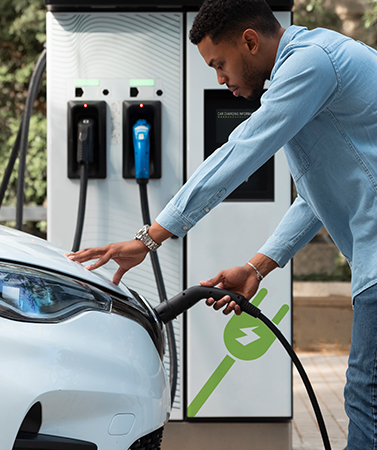
Level 2 runs on 240 volts and jumps to twenty-five miles per hour, so you wake up with a full battery.
Level 3, called DC fast charging, stays at public stations because home panels cannot feed its massive load. When choosing, match the charger amperage to the car and future needs. A 32-amp unit pairs with a 40-amp breaker, while a 48-amp model needs a 60-amp breaker. Selecting wisely now spares you from a second rewiring job later.
Plan a Service Panel Upgrade the Smart Way
If calculations show the panel is too small, upgrade once and leave room for growth. A 200-amp panel covers one car, future solar, and a heat pump. During the swap, ask the electrician to:
- Label every new breaker for quick checks later.
- Install two spare slots for future projects.
- Add whole-house surge protection to guard car electronics.
Because the wall is already open, labor hours stay similar, so sizing up now costs less than adding another upgrade later. A larger panel also raises home value since buyers see a house ready for new tech.
Map the Shortest Safe Circuit Path
Long wire runs waste power and cost extra. Measure from the service panel to the parking spot, then pick the straightest route. The table below shows why distance matters:
| Run Length | Copper Gauge Needed | Voltage Drop | Extra Cost |
| 0–40 ft | 8 AWG | ≈ 2 % | Low |
| 40–80 ft | 6 AWG | ≈ 3 % | Medium |
| 80 ft + | 4 AWG | 3 % + | High |
If the line passes through a garage, use conduit to shield it from bumps and moisture. For outdoor chargers, select weather-rated fittings and seal every joint. Good planning now prevents costly surprises on installation day.
Run New Wires With Care
Mark the stud path and drill clean holes. Avoid gas pipes and water lines. Terminate wires in the charger enclosure. Torque lugs to the maker’s spec because loose lugs heat up.
Key tips
- Leave six inches of slack in each box.
- Color-code conductors for future work.
- Install a weather-tight cover on any outdoor outlet.
These steps take minutes yet add years of safe service. Inspectors also favor tidy wiring, which speeds final approval.
Add Layers of Electrical Protection
Fit the new circuit with ground-fault and arc-fault protection. Ground-fault devices kill power if moisture reaches metal parts. Arc-fault breakers sense tiny sparks hidden in walls and shut things down before flames start. Combine both for top safety. Complete the stack with a surge arrestor at the panel and a smaller device inside the charger. Electric-car batteries dislike voltage spikes, so smooth current extends their life. Though local code may not demand every gadget, installing them lowers risk and boosts peace of mind.
Think Ahead: Solar, Batteries, and Second Cars
Many owners add rooftop panels or storage within five years. Therefore, design today for tomorrow’s loads.
- Run an empty conduit from the roof eave to the panel while the walls are open.
- Reserve two blank breaker slots for a second EV charger.
- Pick a charger that supports load-sharing so two cars split power smoothly.
Future-proofing now avoids drywall cuts later. It also places you in line for utility rebates that reward homes able to shift charging to sunny hours or off-peak nights. Planning keeps monthly bills low and grid stress lower.
Work With Pros and Follow Every Code
A licensed electrician carries insurance, training, and local code knowledge. Ask to see a current license. Request references from recent EV-ready upgrades. Get a written bid that lists wire size, breaker rating, permit fees, and inspection dates. City inspectors will confirm proper grounding, bonding, and conductor sizes during the job. Save the signed permit card; insurers and future buyers often ask for proof. Quality labor costs more than a handyman, yet it delivers safe, code-compliant wiring that protects family and car.
Ready, Set, Charge!
Upgrading the home EV wiring feels big, yet the steps remain clear. First, confirm panel capacity. Then, select the best charger level. Next, map a short circuit path, run strong wires, and stack protective devices. Finally, plan for future loads and call licensed pros. Follow this path, and each night you will plug in, sleep soundly, and wake to a full battery, ready for the road ahead. Ready to upgrade your home’s wiring for fast EV charging? Reach out to Voltus Energy Solutions LLC now and schedule your EV-ready rewiring consultation.